


So I thought I would venture out there and try my first tutorial. I have recently begun making Sock Monsters from the inspiration on this blog, A Cookie in Each Hand. I have just been making them for fun, as something to try. However my hubby, Chris, refuses to let them go! He wants me to make TONS to put in our future kids' rooms. It is quite cute... he is very attached to them.

But when it comes to tutorials I like the really detailed, visual ones because that is they way I learn best. So hopefully this will make sense to you all. But if you feel pretty confident the tutorial from the link above may be better suited for your "super" skills.
 Supplies:
Basics--
- 1 pair of socks (must be mid calf to knee length)
- batting (or some sort of stuffing)
- Needle
- Thread (I used embroidery floss that I had already)
- Sharpie
- Pins
- felt- various colors for eyes and tummy
- buttons- for eyes and tummy embellishments
- embroidery floss- to sew on embellishments
*** I do not have a sewing machine (not yet!) so I hand stitched these... however they would be super easy to use the machine.

1. Flip the sock inside out. Grab the Heel section and fold it together like in the picture below. Should have three little "humps" from the heel to sew together in a straight line. Try to think about how it will look right-side out, you are trying to form two lips.

2. Sew up the Mouth (you can see it finished in the picture above). Then outline the top of your monster, like it's "ears" or "antennas". For this one I made them lopsided, or different heights, and more of a square shape, but you can do what ever you want (see other monsters at end for more ideas).

4. Draw your outline for the legs too. It is Important to not draw a line connecting both legs (like in the groin area) because this is where you will stuff your monster.

6. Cut just outside your outline (make sure not to snip any of your sewing). Also, although you did not sew in the groin area (sorry for using this word so much...haha) you need to cut across here.

8. Take handfuls of the batting and stuff it into the monster, starting at the top. Work out the bumps as you go along. You can decide how much stuffing you want... maybe you want to have a cute chubby monster---so stuff it more!


11. Just like before, cut out the arms and flip them right side out.
12. Stuff the Arms with batting. Leave a little bit of the raw edge without stuffing so you can fold it over.
12. Stuff the Arms with batting. Leave a little bit of the raw edge without stuffing so you can fold it over.


- 1. sew button onto first layer of felt
- 2. trim around button to form a circle
- 3. sew first layer of felt on to the second layer. I used a contrasting color thread so it would show!
- 4. (add the other buttons for other eye onto second layer). Trim around the eyes on second layer of felt.

16. Sew on the eye "patch" with a contrasting thread to make it stand out. I would just go down through the felt and into the body and back out both with the needle before pulling the thread through (like pictured above). When you get to end I would knot of your thread and then I used a pen to push the end of the thread underneath the eye "patch" to hide it.
 17. Cut out a piece of felt for tummy (or you can just add buttons on chest for embellishments (like on my green and blue monster below). Pin the felt onto the monster and sew it on with contrasting thread, like with eye "patch".
 18. YOU'RE DONE!! Congrats you have created your own sock monster.
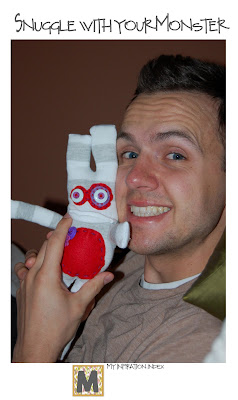 19. Love and snuggle your monster...This step comes highly recommended from my Husband!


Hopefully this tutorial make sense... it is my first... so it may not be my best. If you have any tips to add, watch to share your creations or need any help, please feel free to email me: amandajones85(at)gmail(dot)com!
I hope you enjoy these monsters as much as my Husband and I have. It is fun to pick out the socks and embellishments and get creative. These also make pretty inexpensive gifts and are soooo lovable!